Create products one by one
After accessing VC:
Step 1
Open the main menu and click on Products > Add Products > Add a New Product
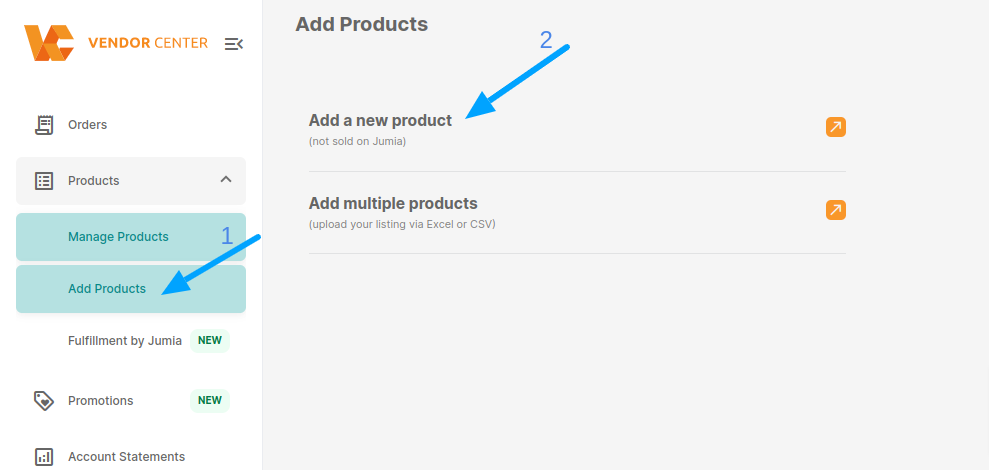
Note: All the fields that have an orange asterisk are mandatory. If you don’t fill them up an error message will be displayed.
Step 2
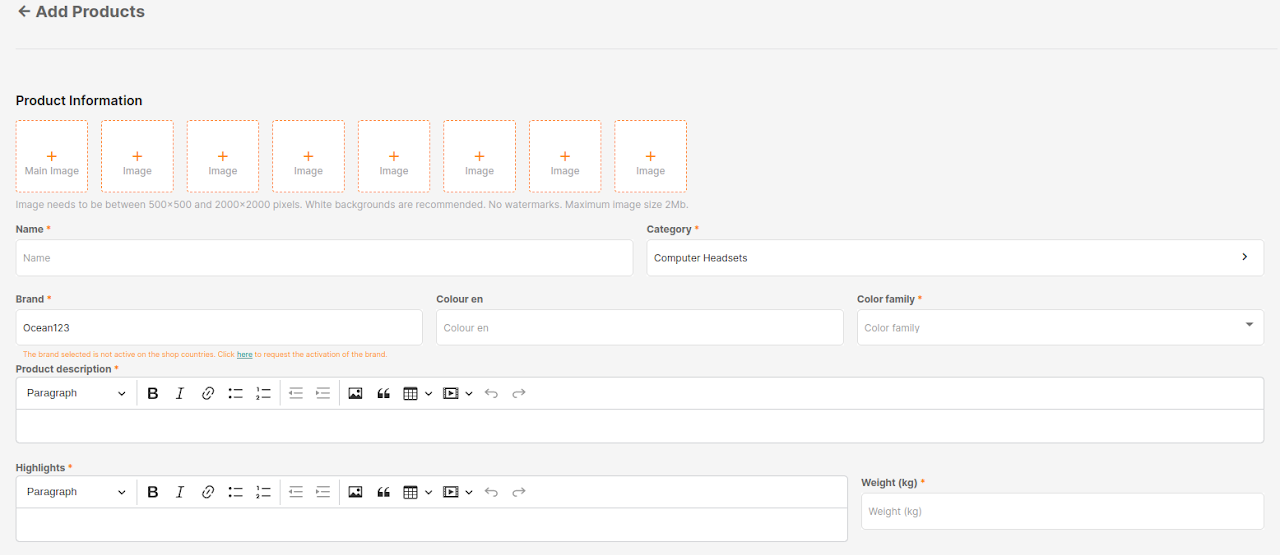
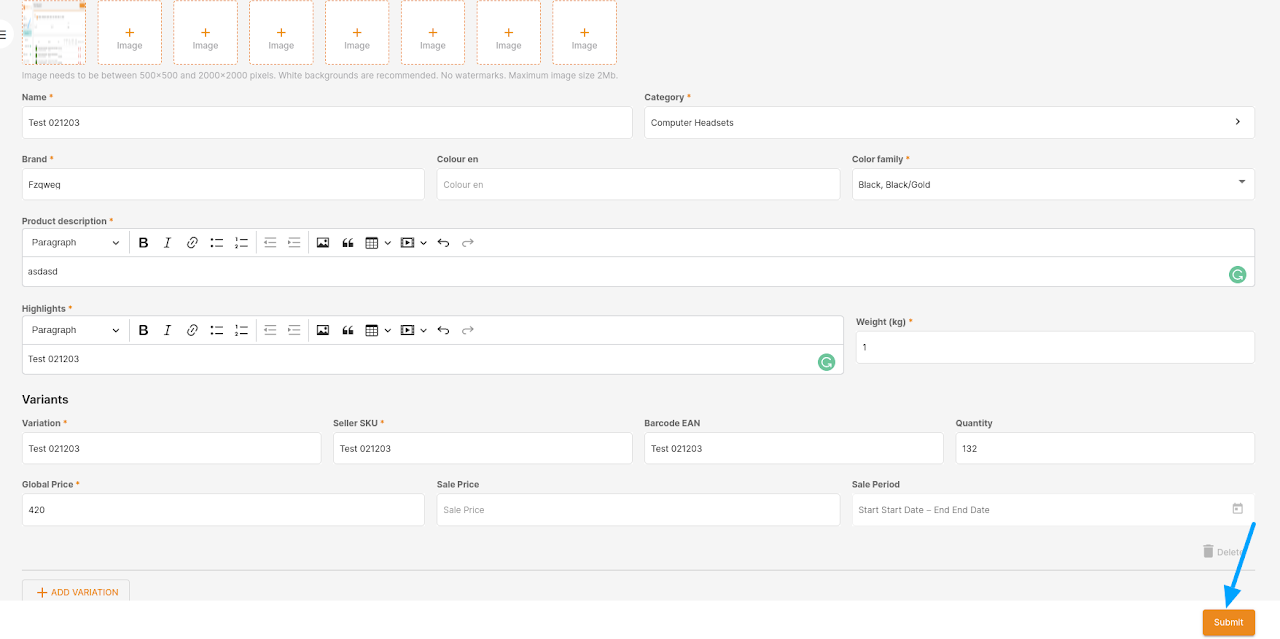
The first part of the form is displayed and you should fill those fields:
*Images
~The first one is the main image and is mandatory. You are able to add up to 8 images.
~The image criteria must be met: dimensions (between 200 x 200 and 3000 x 3000) and format (jpg, jpeg, png). Otherwise, an error message will be displayed
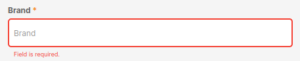
*Name
*Category
~Only after selecting a category, the other fields will be displayed because those depend on the category chosen.
~To choose the Category you can either search by its name on the search bar or look for it on the Category tree.
Step 3
Now with all the fields displayed, you have to fill in at least the mandatory ones before Submitting the form to create the product.
Category / Brand is inactive
>> A warning message will be displayed.
~ The product will still be created but will fail the Quality Control validations. To avoid this you can open the form which link is on the warning message to ask for the Category / Brand activation.


Category / Brand does not exist
>> A warning message will be displayed.
– The product will not be created. You can open the form which link is on the warning message to ask for the Category / Brand creation.


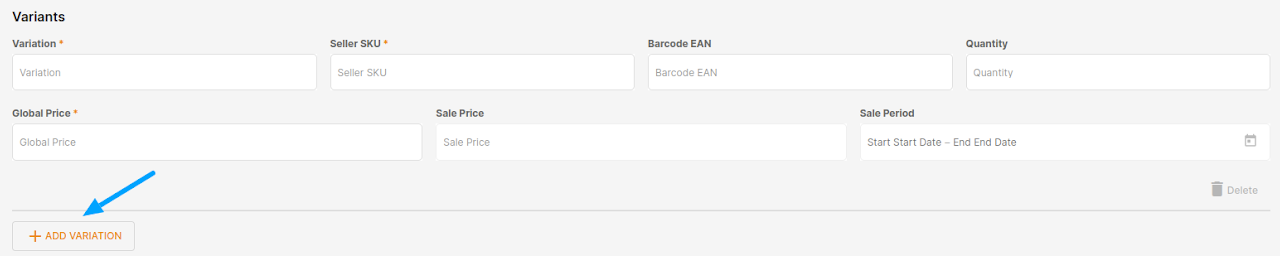
About Variants:
–> Variation (name): Each variation of the Product being created should be unique. Duplicated values are not allowed.
–> Seller SKU and Barcode EAN: Should be unique for all the products of the shop.
–> Quantity: Stock of the product. Must be a positive value.
–> Glocal Price: Is the price that will be added to the product in all the ventures where it is created in the correspondent currency (exchange rate will be applied to calculate the price).
–> Sale Price: Is the discount price to be active on the date selected. Must be lower than Global Price.
–> Sale Price Date: Mandatory if the Sale Price is filled up.
–> You can either Add more than one variation
Important Information:
– You are able to delete a variation if you have more than 1

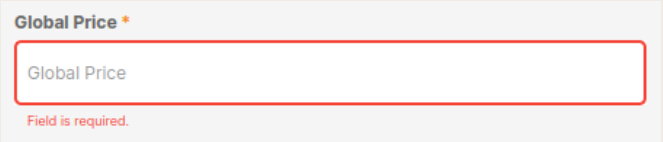
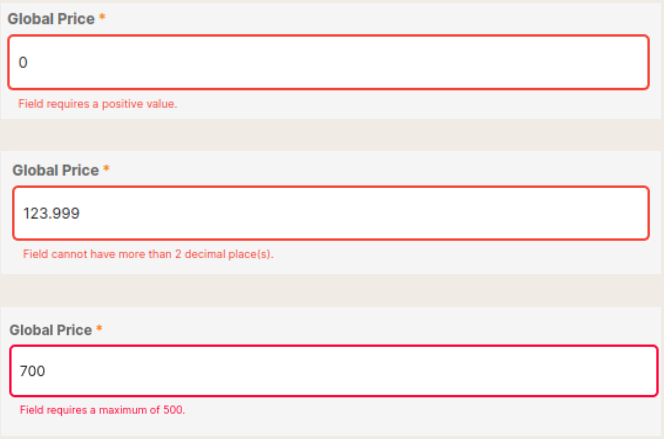
*Price
~> Must be higher than 0.
~> Cannot have more than 2 decimals
~> If the Category has any Price Threshold the Global Price and Sale Price added must meet that requirement or an error message will be displayed.
Step 4
After all the relevant fields are filled up you can click on the Submit button.
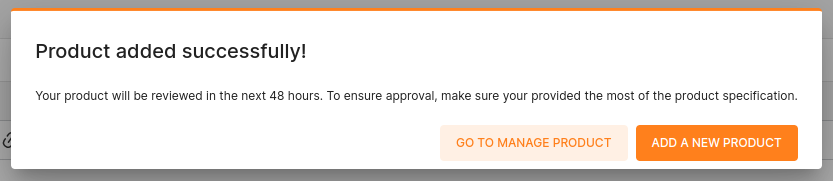
Step 5
Product successfully created
– With no failed validation a Pop up will be displayed. You can either Go to Manage Product page or Add a New Product.
– With one or more failed validations in one of the countries that the shop is active (QC – restriction, other validations) *
Product was not created
– Because it failed a validation. The error message will be displayed in the correspondent field.
~ These validations can be related to the Quality Control
~ Some validations done on the value of the field. Like, number / type of characters, being empty.
~ Some values are duplicated and should be unique.

Create products via CSV
After accessing VC:
Step 1
Navigate to the Products page and click on Import/Export

Step 2
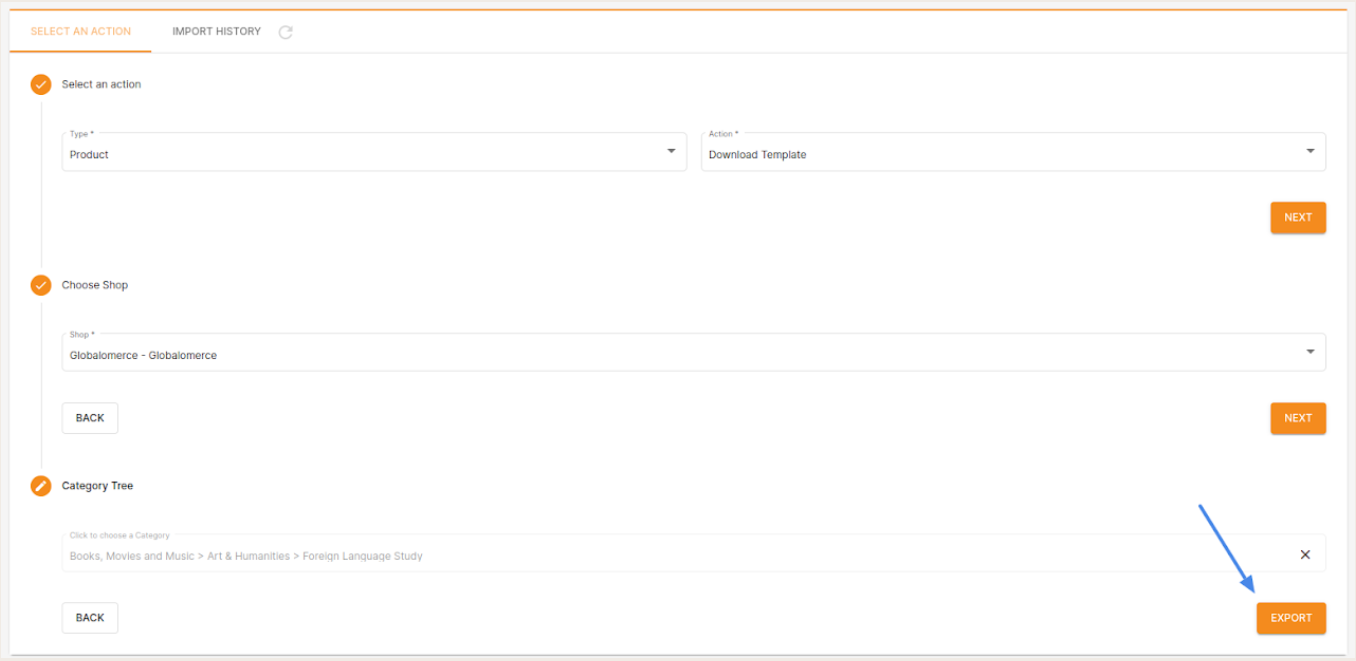
Download the correspondent category template of the product to be created.
– Select the Type: Product
– Select the Action: Download template
– Click Next
– Select the Shop
– Click Next
– Select the Category
– Click Export
Step 3
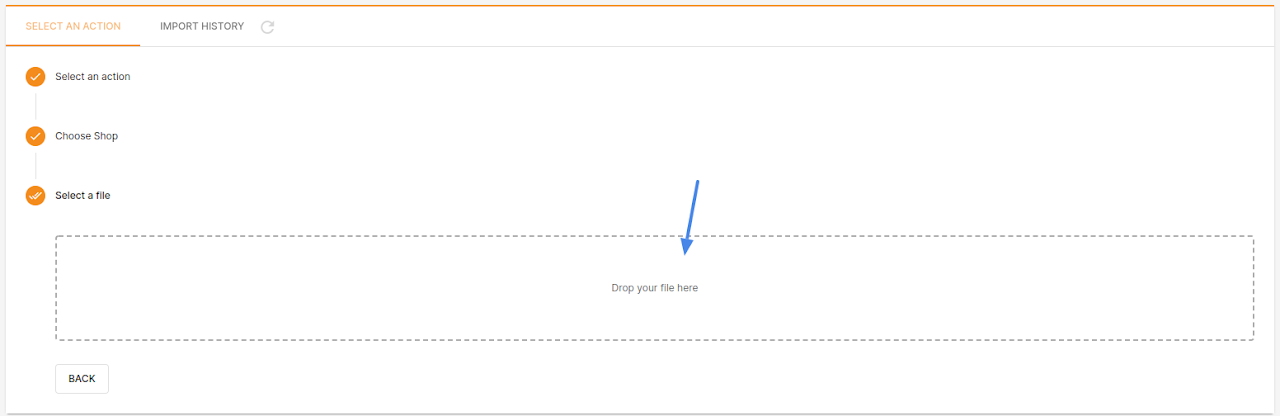
Upload the file after filling up the template:
– Select the Type: Product
– Select the Action: Create Products
– Choose the Shop
– Click Next
– Upload the file
Note: The mandatory fields are highlighted in red in the template.
Step 4
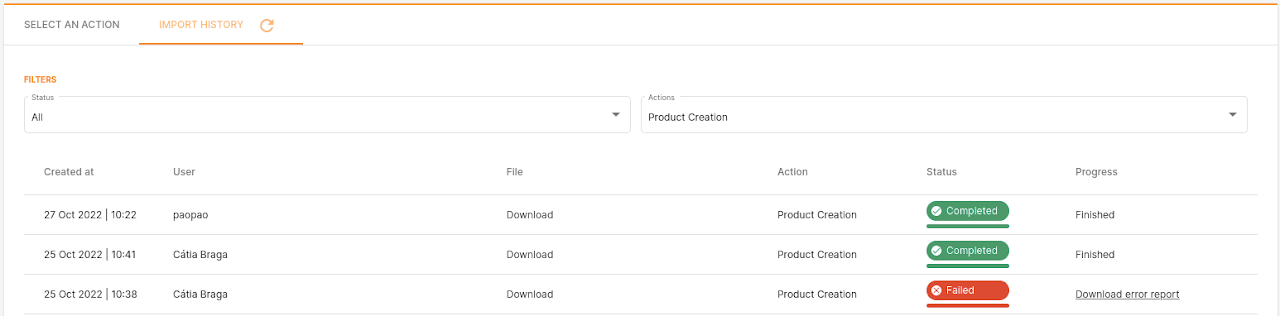
Monitor the import in the Import History.
The Status can be:
– Pending: The file is not being processed yet.
– In progress: The file is being processed.
– Completed: All products in the file were successfully created.
– Failed: One or more products failed to be created. The error report is available in the Progress column
Why Product Creation can fail? Check here.
Update products via CSV
Step 1
Navigate to the Products page and click on Import/Export

Step 2
Export products to be updated
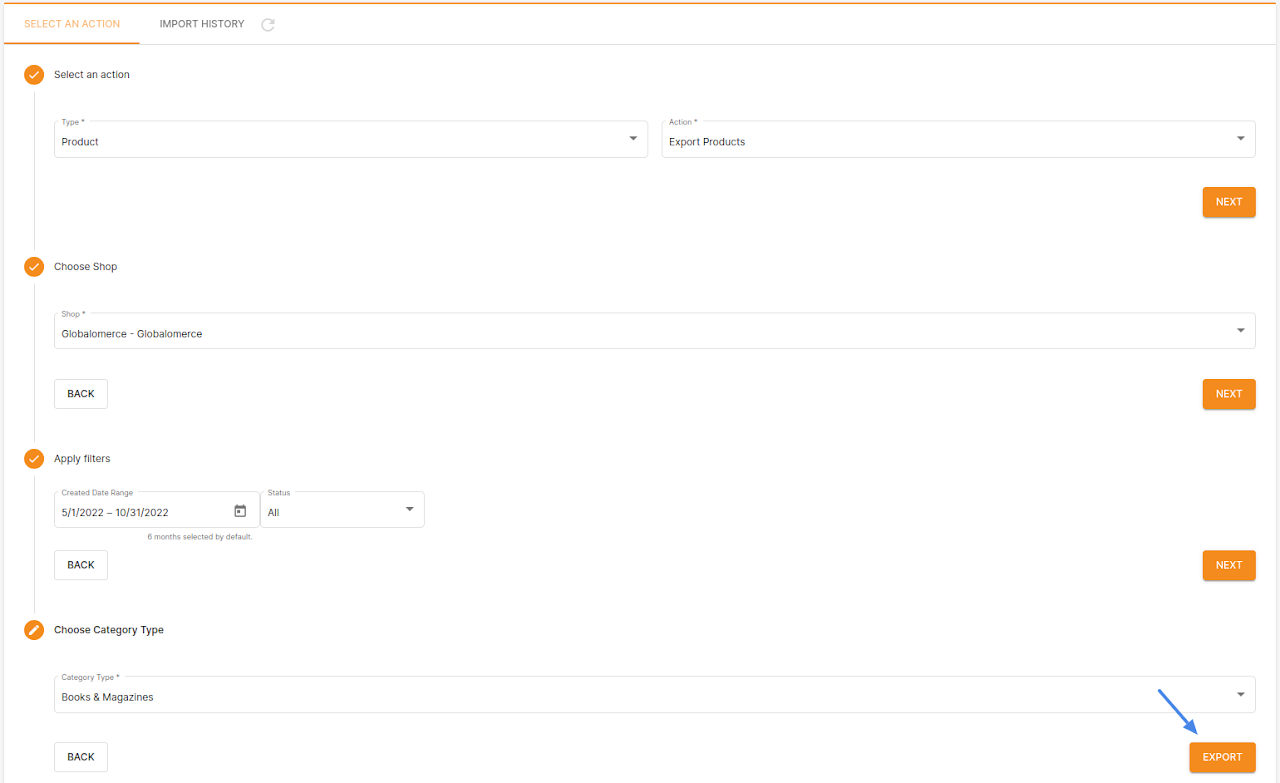
– Select the Type: Product
– Select the Action: Export Products
– Click Next
– Choose Shop
– Click Next
– Apply filters
> Date: when the product was created
> Status: select a specific status of a product if needed
– Click Next
– Select the Category of the product to be exported
– Click Export
Step 3
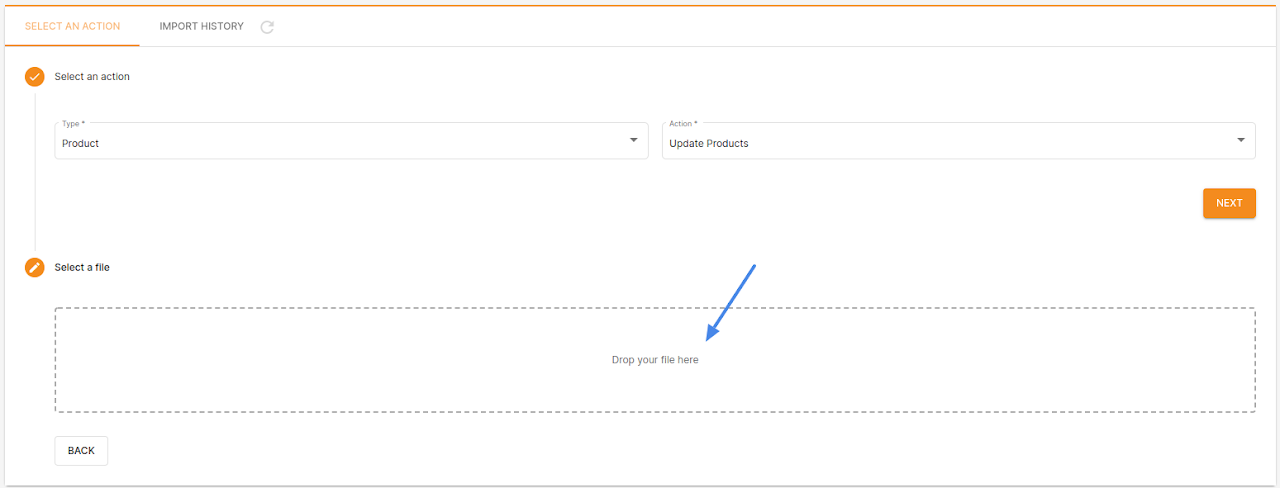
Update the content and Import the file:
– Select the Type: Product
– Select the Action: Update Products
– Click Next
– Upload the file
Step 4
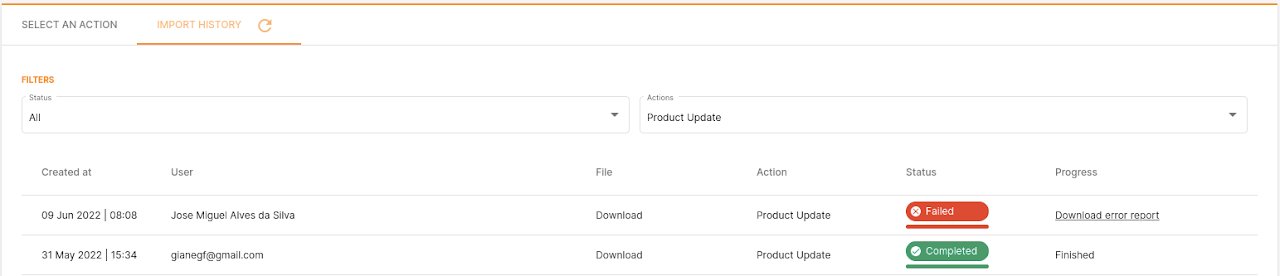
Monitor the import in the Import History.
The Status can be:
- Pending: The file is not being processed yet.
- In progress: The file is being processed.
- Completed: All products in the file were successfully updated.
- Failed: One or more products failed to be updated. The error report is available in the Progress column
Why Product Update can fail? Check here
Update a price of a product via CSV
After accessing VC:
Step 1
* Navigate to the Products page and click on Import/Export

Step 2
Export products that the price will be updated:
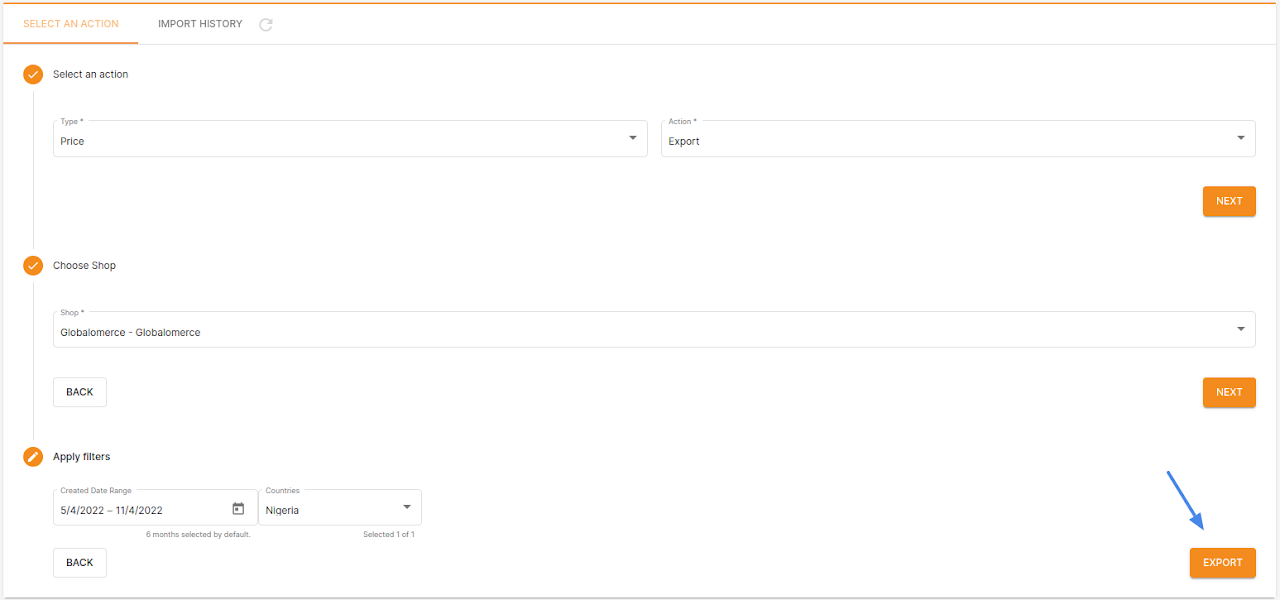
* Select the Type: Price
* Select the Action: Export
* Click Next
* Apply filters
~ Date: when the product was created
~ Countries: select the countries of the products to be filtered
* Click Export
Step 3
Do the price changes on the product you want to do the price update.
The Price Update action allows you to:
~ Add local price if there was not any before
~ Change the Global / Local prices
~ Add / Change the Special price with valid start and end dates
Step 4
Import the file:
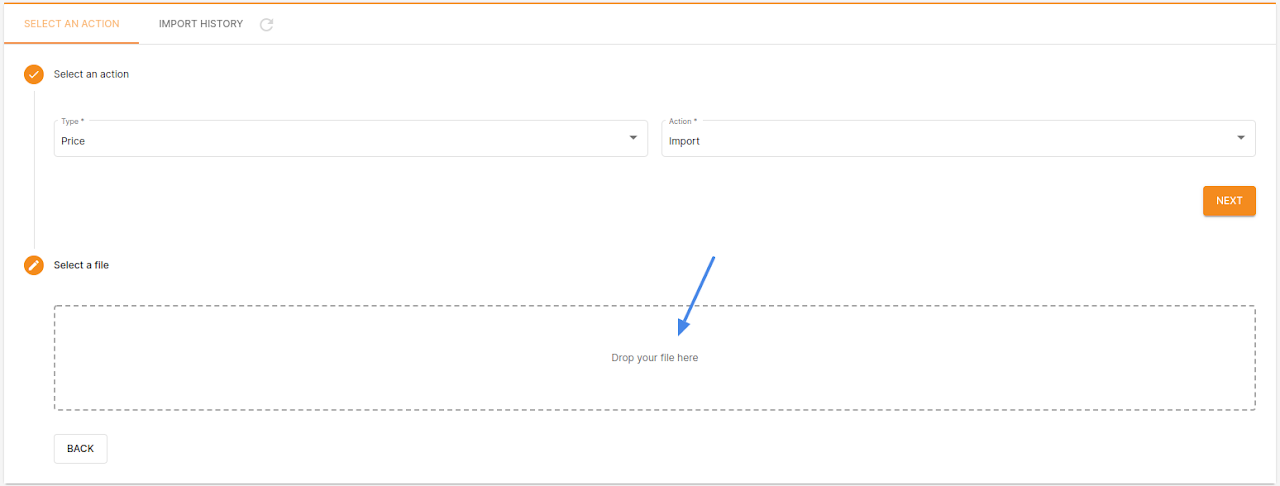
~ Select the Type: Price
~ Select the Action: Import
~ Click Next
~ Upload the file
Step 5
Monitor the import in the Import History.
The Status can be:
Pending: The file is not being processed yet.
In progress: The file is being processed.
Completed: The file was successfully processed.
Failed: One or more products failed to be updated. The error report is available in the Progress column

Activate / deactivate a product via CSV
After accessing VC:
Step 1
– Navigate to the Products page and click on Import/Export
Step 2
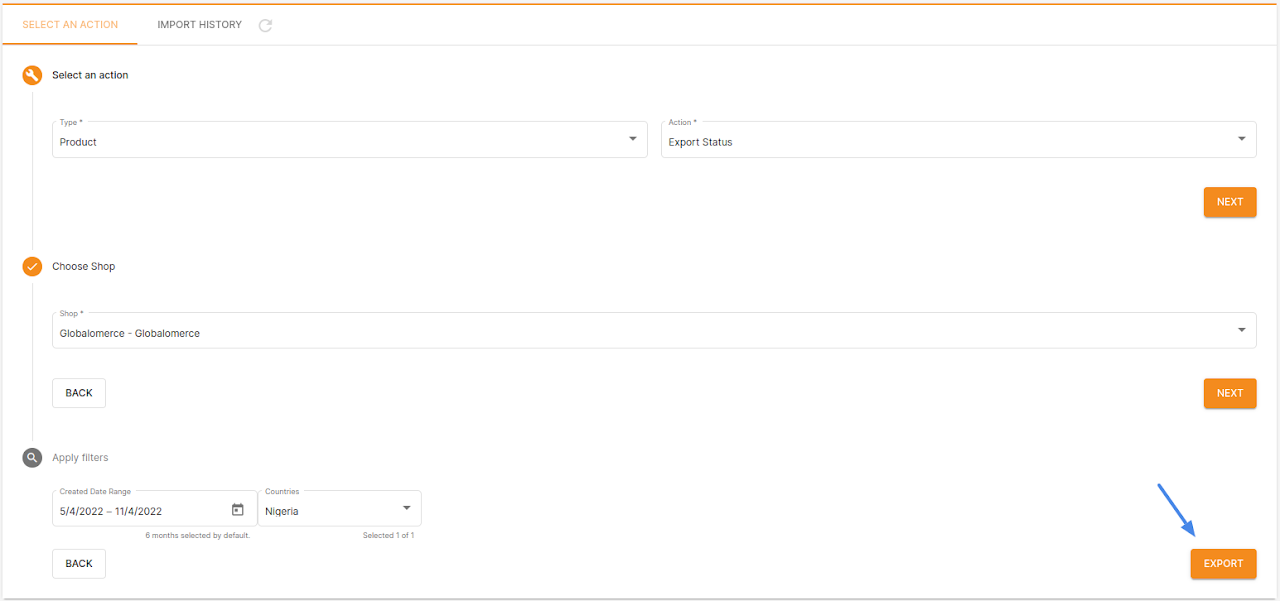
Export products that the status will be updated:
Select the Type: Product
Select the Action: Export Status
Click Next
Choose the Shop
Click Next
Apply filters
– Date: when the product was created
– Countries: select the countries of the products to be filtered
~ Click Export
Step 3
Change the status of the product and country that you want to change:
~ ACTIVE or INACTIVE
Step 4
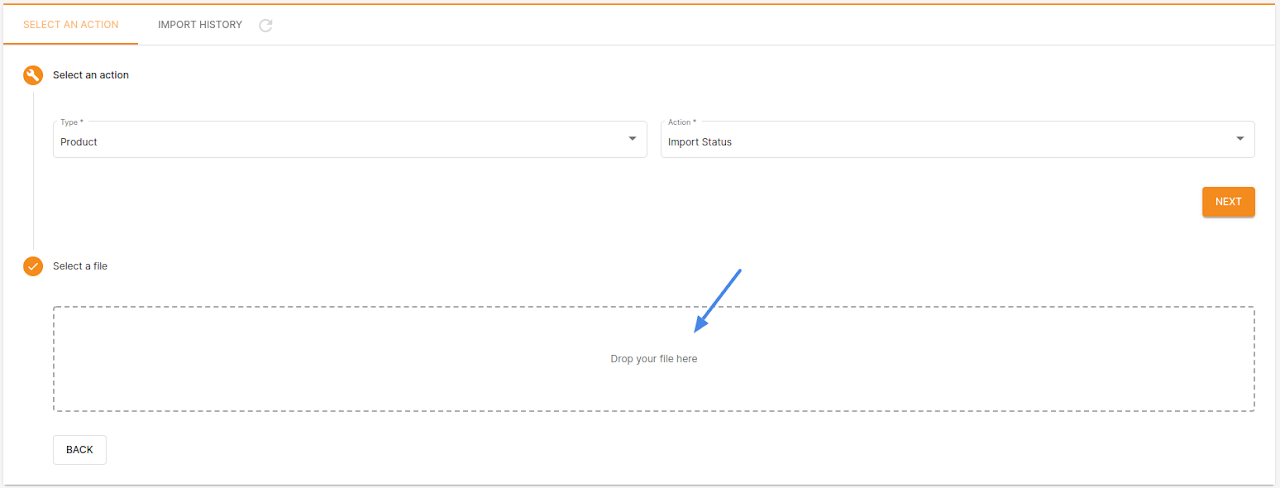
Import the file:
~ Select the Type: Product
~ Select the Action: Import Status
~ Click Next
~ Upload the file
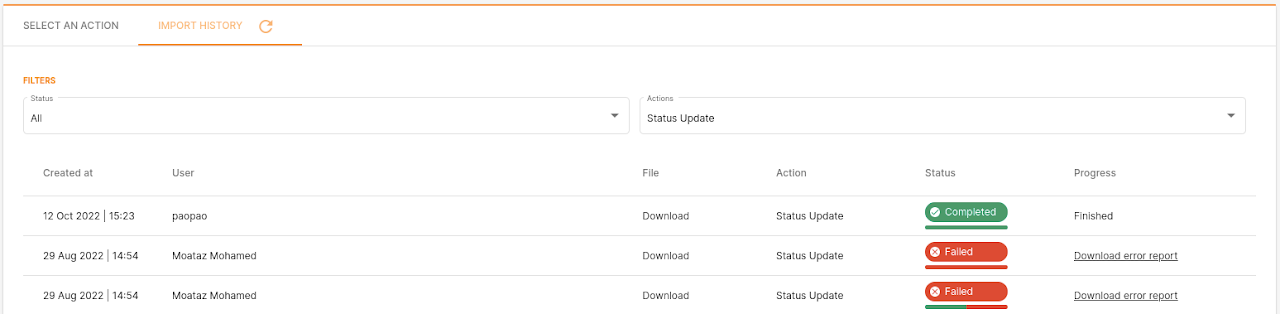
Step 5
Monitor the import in the Import History.
The Status can be:
Pending: The file is not being processed yet.
In progress: The file is being processed.
Completed: The file was successfully processed.
Failed: One or more products failed to be updated. The error report is available in the Progress column
Why product Creation/Update can fail?
Missing mandatory fields or have an invalid value
An error report is generated with the message saying what fields are missing and/or invalid.
Parent SKU, SellerSKU and/or Barcode EAN should be unique and can not be duplicated
An error report is generated with the message saying that SKU Seller and/or Barcode EAN are not unique.
Foreign characters should not be stated in the product Name and its translations
An error report is generated with the message saying that Name and Name Translations have not allowed characters. Check the list here
Brand or Seller Name should not be stated in the product Name and its translations
An error report is generated with the message saying that Name and Name Translations have the brand and/or seller name.
Fail to pass one or more restrictions
For more information on this topic, please check the Quality Control – Restrictions.
Seller SKU already exists on SC
When creating a product in VC with a Seller SKU that already exists on SC (Seller Center), this new VC product won’t be created on SC (won’t be broadcasted to SC ventures). It will only exist in VC.
Product fails a restriction that is applied in all countries
The product is not created in any country.
Error report is generated with the message saying why it failed.
If the product was restricted because of a restricted keyword, an error report is generated with a message saying what is the word and in what fields is being used.
E.g. “Name contains restricted words: Keyword”
If the product was restricted because of a keyword that is prohibited the word won’t be shown in the error report
This happens if when creating the Restriction the checkbox Hidden from sellers was selected
E.g. “Product not authorized.”
Product fails a restriction that is applied only in one country
The product is not created in any country.
Error report is generated with the message saying why it failed.
Product fails a restriction that is applied in all countries and a restriction that is country specific
No error report will be generated because the product was created.
How to know in which country the product was not created?
Go to Products > Search the product > Click on the icon in the “Visible” column > Click on “Product Creation” > Check in which countries the product has status “Unsuccessful”